How To Jailbreak (Tethered Jailbreak) iPhone, iPod Touch On iOS 6.1.3 Using Redsn0w
However, devices with an A4 processor can receive a tethered jailbreak , which this tutorial will describe.
Note 1: This guide describes a tethered jailbreak for A4 devices (iPhone 4, iPhone 3GS, iPod touch 4G) using the latest redsn0w version only
Note 2: If you are not on iOS 6.1.3, it is recommended that you DO NOT UPGRADE, since this will ruin any current untethered jailbreaks.
Note 3: Before jailbreaking with this tutorial, it is recommended that you read through it first, so you can become familiar with the steps.
Note 4: if your iPhone is unlocked via Ultrasn0w, you should stay away from iOS 6.1.3 becasue there is no unlock solution available for now.
Compatible Devices:
Requirements :
Step 1: Download the original iOS 6.0 from the link provided above.
Step 2: Download Redsn0w 0.9.15b3. Link provided above.
Step 3: Connect your A4 iDevice to your computer.

Step 4: Double click the redsn0w zip file and extract it. Navigate to the extracted redsn0w folder, and launch the redsn0w application.


Step 6: Go back to redsn0w’s welcome page, and click the ‘Jailbreak’ button

Step 7: Redsn0w should now start preparing the jailbreak data.

Step 8: Now you may select your jailbreak options – we only recommend that ‘Cydia‘ is selected. Then click ‘Next‘ to continue.

Step 9: Now you will have to put your device into DFU mode. Redsn0w will guide you through the steps below:


Step 10: After redsn0w detects your device, and if everything has gone successfully, then your device will reboot, and a pineapple logo will appear, indicating a tethered boot. You will now have to wait for the process to complete
Once it is complete, you should see the lock screen on your iOS device but Cydia still missing
Step 11:Launch Redsn0w again and click on “Extras” button Then “Select IPSW” button and Point redsn0w to the 6.0 firmware, which you downloaded in step 1
Step 12: Then click on the Just Boot button.
Step 13: Now you will need to put your device is DFU mode, follow the steps on step 9
If all of the above went according to plan, then congratulations! You have jailbroken your A4 device. In order to boot your device from now on, you will need to connect it to your computer, open redsn0w, then go to ‘Extras’, and click on ‘Just Boot’
[video] on how to jailbreak A4 devices on iOS 6.1.3
http://www.youtube.com/watch?v=HXlzL...layer_embedded
Note 1: This guide describes a tethered jailbreak for A4 devices (iPhone 4, iPhone 3GS, iPod touch 4G) using the latest redsn0w version only
Note 2: If you are not on iOS 6.1.3, it is recommended that you DO NOT UPGRADE, since this will ruin any current untethered jailbreaks.
Note 3: Before jailbreaking with this tutorial, it is recommended that you read through it first, so you can become familiar with the steps.
Note 4: if your iPhone is unlocked via Ultrasn0w, you should stay away from iOS 6.1.3 becasue there is no unlock solution available for now.
Compatible Devices:
- iPhone 4
- iPhone 3GS
- iPod Touch 4G
Requirements :
Step 1: Download the original iOS 6.0 from the link provided above.
Step 2: Download Redsn0w 0.9.15b3. Link provided above.
Step 3: Connect your A4 iDevice to your computer.
Step 4: Double click the redsn0w zip file and extract it. Navigate to the extracted redsn0w folder, and launch the redsn0w application.
Note 5: Windows XP and Windows 7 users should run Redsn0w as ‘Administrator’ (right-click on the Redsn0w exe and select ‘Run as an Administrator’)Step 5: Click on ‘Extras‘, then click on ‘Select IPSW‘. Point redsn0w to the 6.0 firmware, which you downloaded in step 1.
Step 6: Go back to redsn0w’s welcome page, and click the ‘Jailbreak’ button
Step 7: Redsn0w should now start preparing the jailbreak data.
Step 8: Now you may select your jailbreak options – we only recommend that ‘Cydia‘ is selected. Then click ‘Next‘ to continue.
Step 9: Now you will have to put your device into DFU mode. Redsn0w will guide you through the steps below:
- Hold down the power button (on top of your device)for 3 seconds.
- Then, without releasing the power button, hold down the home button and keep the two buttons pressed for 10 seconds.
- Now release the power button, but keep holding the home button down until redsn0w detects your device.
Step 10: After redsn0w detects your device, and if everything has gone successfully, then your device will reboot, and a pineapple logo will appear, indicating a tethered boot. You will now have to wait for the process to complete
Once it is complete, you should see the lock screen on your iOS device but Cydia still missing
Step 11:Launch Redsn0w again and click on “Extras” button Then “Select IPSW” button and Point redsn0w to the 6.0 firmware, which you downloaded in step 1
Step 12: Then click on the Just Boot button.
Step 13: Now you will need to put your device is DFU mode, follow the steps on step 9
If all of the above went according to plan, then congratulations! You have jailbroken your A4 device. In order to boot your device from now on, you will need to connect it to your computer, open redsn0w, then go to ‘Extras’, and click on ‘Just Boot’
[video] on how to jailbreak A4 devices on iOS 6.1.3
http://www.youtube.com/watch?v=HXlzL...layer_embedded
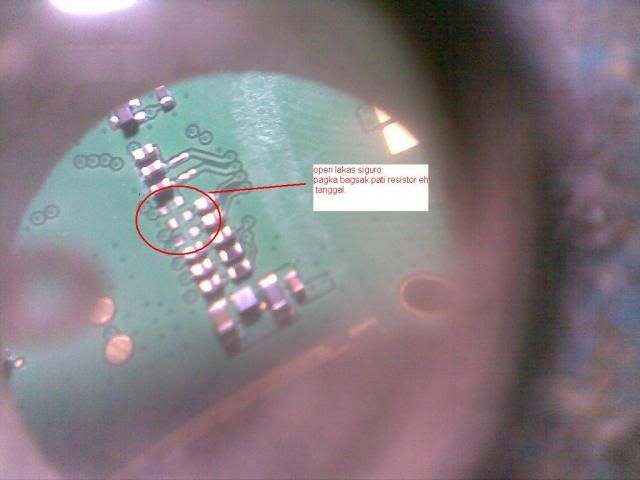
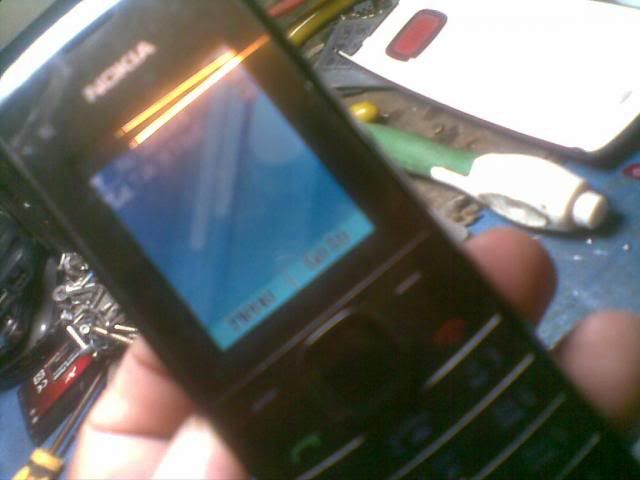
Nokia X1-01 No Power Basag Lcd & Resistors Lcd Ways Done.
HISTORY:
No power basag lcd try to selftest mxkey finding "LCD FAILED"

ACTION TAKEN:
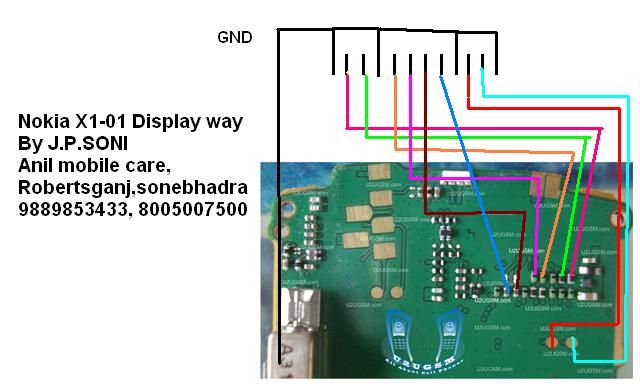
Replace new LCD no luck,i try to trace lcd ways viola i got it.
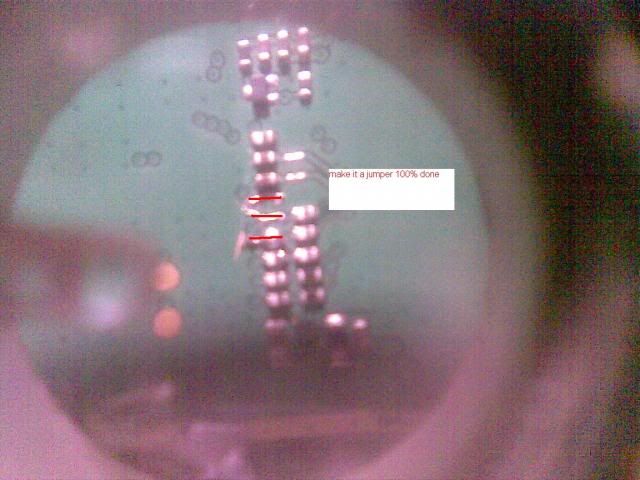
FINISH & TEST:
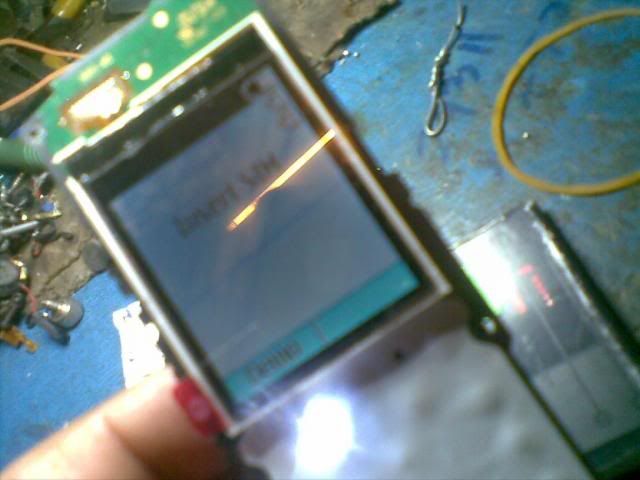
Thanks For ViewinG
No power basag lcd try to selftest mxkey finding "LCD FAILED"
ACTION TAKEN:
Replace new LCD no luck,i try to trace lcd ways viola i got it.
FINISH & TEST:
Thanks For ViewinG
blackberry 9800 china keypad 7 , 8 , 9 not work solve tricks pic inside
model; blackberry 9800 china
problem; keypad 7,8,9 not working


problem solve
problem; keypad 7,8,9 not working
problem solve
[Root] step by step Manual i9082 (L) Galaxy GRAND
How to Root I9082 / I9082L -
STEP BY STEP rooting manual for GSM-Hosting users
Just follow this simple steps:
1. Step
- Download Samsung USB drivers ----> Click HERE
- Download ODIN 3.04 from ----> Click HERE
- Download i8092 recovery image prerooted ----> Click HERE
- Download SuperSu Last version ----> Click HERE
2. Step
- Turn off phone, then switch to download mode:
press together [volume down]+[home button]+[power button] (all at once),
press [volume up] for comfirm download mode.
- Connect usb cable, install drivers.
3. Step
- Run Odin 3.04, ticked 2 option F.reset times+auto reboot,
- Extract CWM-touch_i9082_chotu.tar.zip !Select PDA and browse to where you have extracted CWM-touch_i9082_chotu.tar.md5
and select it
4. Step
- Odin should show device under 1 of ID:COM port.(if this not happends repeat from STEP 2)
- Press START.
- Phone should power on after flashing complete.
5. Step - ROOTING:
- Copy Downloaded SUperSU to externel sdcard (NOT INTERNAL ! )
- Power off your phone, after press [Vol up] + [Power] + [Home button] (all at once)
- SelectInstall zip from sdcard --->choose zip from sdcard ---> scroll down and select Fix Recovery.zip and
again choose zip from sdcard and flash UPDATE-SuperSU-v1.05.zip
Done ! And you are ready to go
thanks goes to chotu.
Repair Boot LG Optimus 3D,Cube, BY USB Free!!!
Tutorial how repair boot Optimus 3D by USB!!
No need to explain much, the steps are the same as I9250 to repair boot..
1. Connect phone without battery,phone detect OMAP4430
2. Install driver omap "inside folder have drivers"(omap4boot-for_optimus-v1.22 modified by XcachorroX®\usb_drv_windows)
3. Run file start_fastboot.bat and follow the instructions,after this you see logo LG in phone,
4. now enter downlaod mode "connect phone without battery press volumen+ and connect cable,now enter download mode,run SmartFlashTool_External.exe and open folder BOOTV21E select BOOTV21E_AP.bin & BOOTV21E_CP.fls after press Start Button.
5. After all this steps you can write any firmware to phone,enter download mode " connect phone without battery press volumen+ and connect cable,open LGtool select model and select firmware......and rest you know all there is no need to explain
PS: Original Solution is from wkpark but not have in list P925G "roger version" i edit soft and add on list this model and work with same loader/u_boot P920 and correct some errors in the procedure to repair.
/images of the procedure/
1

2

3

4

files:
SmartFlashTool_External+BOOTV21E files.rar
omap4boot-for_optimus-v1.22 modified by XcachorroX®.rar
No need to explain much, the steps are the same as I9250 to repair boot..
1. Connect phone without battery,phone detect OMAP4430
2. Install driver omap "inside folder have drivers"(omap4boot-for_optimus-v1.22 modified by XcachorroX®\usb_drv_windows)
3. Run file start_fastboot.bat and follow the instructions,after this you see logo LG in phone,
4. now enter downlaod mode "connect phone without battery press volumen+ and connect cable,now enter download mode,run SmartFlashTool_External.exe and open folder BOOTV21E select BOOTV21E_AP.bin & BOOTV21E_CP.fls after press Start Button.
5. After all this steps you can write any firmware to phone,enter download mode " connect phone without battery press volumen+ and connect cable,open LGtool select model and select firmware......and rest you know all there is no need to explain
PS: Original Solution is from wkpark but not have in list P925G "roger version" i edit soft and add on list this model and work with same loader/u_boot P920
and correct some errors in the procedure to repair./images of the procedure/
1
2
3
4
files:
SmartFlashTool_External+BOOTV21E files.rar
omap4boot-for_optimus-v1.22 modified by XcachorroX®.rar
[Root] step by step Manual i9105 (P) Galaxy S2 Plus
How to Root I9105 / I9105P Galaxy2 PLUS -
STEP BY STEP rooting manual for GSM-Hosting users
Just follow this simple steps:
1. Step
- Download Samsung USB drivers ----> Click HERE
- Download ODIN 3.04 from ----> Click HERE
- Download CWMtouch-i9105_chotu.tar.md5.zip recovery image from here ------> Click HERE!
for other type fw (Indian) download this recovery image ---> Click HERE!
- Download SuperSu Last version ----> Click HERE
2. Step
- Turn off phone, then switch to download mode:
press together [volume down]+[home button]+[power button] (all at once),
press [volume up] for comfirm download mode.
- Connect usb cable, install drivers.
3. Step
- Run Odin 3.04, ticked 2 option F.reset times+auto reboot,
- Extract CWM-touch_i9082_chotu.tar.zip !Select PDA and browse to where you have extracted CWM-touch_i9105_chotu.tar.md5 or CWM-touch_i9105_Indian_chotu.tar.md5
and select it
4. Step
- Odin should show device under 1 of ID:COM port.(if this not happends repeat from STEP 2)
- Press START.
- Phone should power on after flashing complete.
5. Step - ROOTING:
- Copy Downloaded SUperSU to externel sdcard (NOT INTERNAL ! )
- Power off your phone, after press [Vol up] + [Power] + [Home button] (all at once)
- SelectInstall zip from sdcard --->choose zip from sdcard ---> scroll down and select Fix Recovery.zip and
again choose zip from sdcard and flash UPDATE-SuperSU-v1.05.zip
Done ! And you are ready to go
thanks goes to chotu.
[Driver]Latest version SAMSUNG USB Drivers for Mobile Phones
Tired downloading/installing KIES only for last drivers?
SO this thread for you
Download and Install Samsung's latest USB drivers & ADB Interface: February 2013!
SAMSUNG USB Drivers for Mobile Phones (x86 & x64) v1.5.18.0 ===> Click HERE
Step by step installation manual:
- Uninstall previous version from control panel and reboot pc
- Install new Drivers and again reboot pc
- Turn ON “USB debugging” mode on your Android device
- Connect you phone and enjoy
Here Samsung Android ADB interface Drivers from MS:
DOWNLOAD Driver v2.9.507.0 ===> Click HERE
[TUTORIAL]How to root\install CWM Symphony W60
Here is the full procedure with video tutorial

Symphony W60
Stock ROM
Custom ROM
Tools & Drivers
Thanks xda for this tutorial.
Symphony W60
Stock ROM
- Stock Kernel/Boot : http://www.4shared.com/file/c6WIitpa..._boot_w60.html
- Stock Recovery : http://www.4shared.com/file/yvQpFC6v...overy_w60.html
- Stock Rom :
Custom ROM
- Custom/Patched Kernel/Boot : http://www.4shared.com/file/ggI0DxQh..._patched_.html
- Custom Recovery (ClockWork Mod Recovery) : http://www.4shared.com/file/9oW2F6k4...recovery_.html
- Custom Rom :
Tools & Drivers
- Flash Tools : http://www.4shared.com/archive/A9FP4..._v3121605.html
- MTk Scatter File : http://www.4shared.com/office/90qgb0...tter_emmc.html
- Root Files(SuperUser) : http://www.4shared.com/zip/daykUw47/...rm-signed.html
Thanks xda for this tutorial.
[TUTORIAL]How to root\install CWM Symphony W60
Symphony W60
Stock ROM
- Stock Kernel/Boot : http://www.4shared.com/file/c6WIitpa..._boot_w60.html
- Stock Recovery : http://www.4shared.com/file/yvQpFC6v...overy_w60.html
- Stock Rom :
Custom ROM
- Custom/Patched Kernel/Boot : http://www.4shared.com/file/ggI0DxQh..._patched_.html
- Custom Recovery (ClockWork Mod Recovery) : http://www.4shared.com/file/9oW2F6k4...recovery_.html
- Custom Rom :
Tools & Drivers
- Flash Tools : http://www.4shared.com/archive/A9FP4..._v3121605.html
- MTk Scatter File : http://www.4shared.com/office/90qgb0...tter_emmc.html
- Root Files(SuperUser) : http://www.4shared.com/zip/daykUw47/...rm-signed.html
Thanks xda for this tutorial.
Subscribe to:
Posts (Atom)
All About Mobiles Headline Animator