Sony Ericsson Xperia Neo (Version 4.0.4) MT15i Free Flash File Here
Sony Ericsson Xperia Arc S (Version 4.0.4) LT18i Free Flash File Here
Sony Ericsson Xperia Arc S (Version 4.0.4) LT18i Free Flash File Here
Sony Ericsson Xperia Arc (Version 4.0.4) LT15i Free Flash File Here
Sony Ericsson Xperia Arc (Version 4.0.4) LT15i Free Flash File Here
Sony Ericsson Xperia Play (Version 2.3.4) R800i Free Flash File Here
Sony Ericsson Xperia Play (Version 2.3.4) R800i Free Flash File Here
Sony Erricson Xperia 2010 Some Free Flash File Here
Sony Erricson Xperia 2010 Some Free Flash File Here
Sony Erricson Xperia X8 Flash File Here
Sony Erricson Xperia X10 Free Flash File Here (Version 2.3.3) X10i
Sony Erricson Xperia X10 Decomo Free Flash File Here (Version 2.3.3) SO-01B
Sony Erricson Xperia X10 Mini Free Flash File Here (Version 2.1) E10i
Sony Erricson Xperia X10 Mini Pro Free Flash File Here (Version 2.1) U20i
SYMPHONY FT05 SENSOR TOUCH TO NORMAL TOUCH CONVERT SUCCESS by helpful-man
SYMPHONY FT05 & ZEN-M45 SENSOR TOUCH TO NORMAL TOUCH CONVERT
SUCCESS
BY
helpful-man


this sensor touch not available in market

1

THIS NORMAL TOUCH AVAILABLE IN MARKET
2

3

ANYONE HAVE THIS MOBILE TRY THIS SOLUTION & POST RESULT
SUCCESS
BY
helpful-man
this sensor touch not available in market
1
THIS NORMAL TOUCH AVAILABLE IN MARKET
2
3
ANYONE HAVE THIS MOBILE TRY THIS SOLUTION & POST RESULT
Sony Ericsson Xperia Active (Version 4.0.4) ST17i Free Flash File Here
Sony Ericsson Xperia Active (Version 4.0.4) ST17i Free Flash File Here
Download Now
Sony Ericsson Xperia Active (Version 4.0.4) ST17i Free Flash File Here
Sony Ericsson Xperia Active (Version 4.0.4) ST17i Free Flash File Here
Download Now
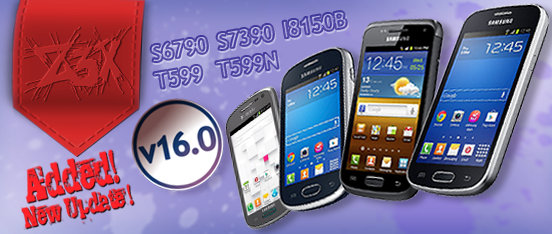
Z3X-Box Samsung Update 16.0 - L720, T599, S6790 and more added
Samsung TooL Update 16.0 First in the world
- support Samsung GT-S6790 (direct unlock, imei repair, flashing)- first in the world
- support Samsung GT-S6790N (direct unlock, imei repair, flashing) - first in the world
- support Samsung GT-S7390 (direct unlock, imei repair, flashing) - first in the world
- support Samsung GT-I8150B (direct unlock, imei repair, flashing)
- support Samsung GT-I8150T (direct unlock, imei repair, flashing)
- support SPH-L720 (direct unlock*, imei repair, flashing) - first in the world
- support SGH-T599 (direct unlock, imei repair, flashing)
- support SGH-T599n (direct unlock, imei repair, flashing)
L720* tested with MDC,MDL baseband. MF9 not tested. if something wrong with MF9, flash MDC, MDL firmware from support
dial #0808# and enable DM + MODEM + ADB, + enable debug in menu.
Discuss here
Z3X-BOX Samsung Update 16.0 - L720, T599, S6790 and other first in the world
Samsung TooL Update 16.0 First in the world
- support Samsung GT-S6790 (direct unlock, imei repair, flashing)- first in the world
- support Samsung GT-S6790N (direct unlock, imei repair, flashing) - first in the world
- support Samsung GT-S7390 (direct unlock, imei repair, flashing) - first in the world
- support Samsung GT-I8150B (direct unlock, imei repair, flashing)
- support Samsung GT-I8150T (direct unlock, imei repair, flashing)
- support SPH-L720 (direct unlock*, imei repair, flashing) - first in the world
- support SGH-T599 (direct unlock, imei repair, flashing)
- support SGH-T599n (direct unlock, imei repair, flashing)
L720* tested with MDC,MDL baseband. MF9 not tested. if something wrong with MF9, flash MDC, MDL firmware from support
dial #0808# and enable DM + MODEM + ADB, + enable debug in menu.
Direct link
MTK Flash Tool_v5.1312.00_By GSM_HOQUE
MTK Feature Phone Flash Tool
(Win All 32/64)
Version Description
Release Note :-
v5.1312.0
In this version, the USB Switch Tool has been updated. We can configure the USB Switch Tool.ini [Enable Rescue Mode=true] to switch device to the BROM USB com port. By default, the normal mode is enabled instead of rescue mode.
* MUST update: You must update Flash Tool in order to prevent download error.
* Strongly recommend: We strongly recommend you to update the tool for getting more useful functionality.
New Features:
[MT6250/MT6260] Support Boot ROM USB download if the target flash is secure load.
[MT6260] Support MT6260 EFUSE Write function.
Bug Fix:
[MT6256] Fix the secure USB download fail in MT6256 platform.
[MT6280] Fix download security SW fail to flash.
Enhancements:
[MT6280/MT6276M] Improve the USB Switch Tool for reducing the CPU consumption.
[MT6280/MT6276M] USB Switch Tool supports the rescue mode switch by the setting of USB Switch Tool.ini.
v5.1232.00
[MT6252,MT6250] Provide the download function if the load setting is 128Kb virtual block.
Bug Fix:
[SV3 chips] Fix the bug about closing COM port delayed caused from abnormal protocol between PC side and target side
[MT6250] Provide the OTP function for dual serial flash platform, but tool only support to write the OTP region on the first flash.
[SV3 NOR Platform] Fix the partial download tool checking rule. User may encounter download fail if you only choose ROM file to download.
[MT6276] Fix Restore fail in the Backup/Download/Restore flow via UART cable
v5.1220.00
[MT6250] Support new platform MT6250 Download function
Bug Fix:
[All Chips][BROM DLL] Fix the bug about auto-load MAUI bin function. User may encounter the error messages "Access violation at address 0x01234567 in module BROM. DLL. Read of address 0x0000000” showed when user is executing Flash Tool.exe.
[MT6252/MT6251][DA] Fix the bug about boot loader usb download fail in Giga Device memory.
Enhancement:
[MT6276/MT6255][DA] Enhance the NFI v3 driver control for preventing the potential download problem.
[All chips][BROM DLL] Add padding character if the remote file is odd characters in the remote file callback function.
v5.1212.00
[MT6256/MT6255] Support Download Without Battery Feature. User does n\'t need battery for download stage. At first, user need to choose "USB Download Without Battery" in the UI options. Then only plug-in usb cable and press KCOL0 to trigger Boot ROM USB download.
[SV5 NAND project] Support EXT-Bootloader self-update feature. This feature allow user to update EXT-bootloader in Boot-loader USB download flow.
[SV3 NOR project] Support Boot Certificate V2 feature.
Bug Fix:
[MT6276/MT6276M] Fix download fail issue caused from bad block management. The symptom is download fail error and the progress bar is stopped at 85%.
[MT6255 SPASION ADUMUX] Tool shows download fail at 65% progress.
Because tool costs a lot of time to wait SPASION flash program and erase, PC side and Target side hand-share mechanism is insufficient that PC side timeout and report the download fail.
Enhancement:
[SV3 NAND project] Check resource version instead of project ID between MAUI ROM and MBA resource ROM, if MAUI ROM contain resource version.
v5.1209.00
[SV5 NAND project] Solve the remark bad block defect happened in the NAND flash that the page size is 512B.
[MT6256] Fix the UART download fail in MT6256 ECO platform
Enhancement:
[SV3 NAND project] Support to download boot loader which the size is bigger than two physical block size.
v5.1205.00
[MT6255] Support to download the new platform MT6255
Enhancement:
[SV5 NAND project] Support to write raw data to MAUI Control Block Region(CBR).
v5.1152.00
[UI] When user develop the Flash Tool UI, you may need environment by clicking TFT Gauge_setting.bat under Flash Tool UI source code setting if you encounter this error message.
"Class TFT Gauge not found. Ignore the error and continue? NOTE: Ignoring the error may cause components to be deleted or property values to be lost.”
Enhancements:
[DA] DA always force erase for the Micron serial flash in the erase operation.
Support Memory:
Add new flash: SF_GD25LQ128 and NAND_FM61D1G12A_5BGE
v5.1140.00
[SV5 Platform] Support customer parameter feature which download customized binary in CBR region.
[MT6252, MT6251] Support WIN-BOND OTP function
1) There are four security register banks(OTP) in WINBOND flash. The bank0 is Reserved by Win-bond for future use. We only use bank1~bank3. One banks size is 0x100. User could directly use 0x0 to 0x300 address that the flash tool driver will direct these address from bank1 to bank3
2) The WIN-BOND flash unique feature is the security register banks are not One-Time-Program. That could be erase by specific command. In order to prevent format these regions, user must use "Lock" these regions in order to prevent data changed in security banks.
Bug fixes:
[MT6276] Fix the bug about Create CBR fail caused from bad block management method
Enhancements:
[SV3 Platform] MMAA support 4 flash ID comparison.
Memory support:
Add new serial flash: SF_N25W064A11EF640F, SF_MX25U12835FZNI_10G and SF_MX25L12835EMI_10G.
Note: SV5 Platform: MT6251, MT6276. SV3 platform: other chips
v5.1128.06
1. [MT6276/MT6251/MT6276M][BROM DLL] Support access remote file path by customized callback function which setup in DL_Set Callback(). Please reference the slides: Flash tool-Remote download customization guide.ppt
Bug fixes:
1. [MT6235/MT6268] [DA] Fix the memory test bug about ram pattern test fail due to the wrong address setting
2. [MT6253/MT6238/MT6223/MT6921][BROM DLL][UI]Fix display the wrong progress bar (per-format progress) in download MAUI stage. Because NOR platform doesn’t need to per-format flash before download MAUI.The pre-forma process only be happened in serial-flash platform.
Structure modification:
Add pre-format callback function in Flash Tool_Download_Arg, FLASH TOOL_DOWNLOAD_ARG structure.
Delete setup progress color callback function in Flash Tool_Download_Arg, FLASH TOOL_DOWNLOAD_ARG structure.
3. [MT6276/MT6251/MT6276M][BROM DLL] Fix display the wrong progress bar (download MAUI progress) in download boot loader stage. Change the color of progress bar from blue to purple.
4. [MT6276M][META DLL] Fix the bug about popping wrong error message when user use "Upload" function.
Enhancements:
N/A
Memory support:
Support new Serial flash memories: SF_GD25LQ64
Version Description
v5.1124.00
1. [META DLL] Fix a bug regarding the "Restore Only" function
2. [META DLL] Support force to write file if the file already exist on the target
3. [BROM DLL] Fix the BROM DLL link error if users use the following API: Brom_StartCmd_Ex, Brom_Connect_Ex and Flash Tool_Format_Ex
4. [BROM DLL] Fix the bug that user cannot load the MAUI load while the local directory path is too long
5. [UI] Display the real progress bar when users upload files
6. [DA] Fix the PCT serial flash geometry
Enhancements:
N/A
Memory support:
N/A
v5.1120.00
1. Flash Tool support the new chip: MT6276M Data Card and MT6921
Bug fixes:
1. [DA] Fix an issue regarding the secure usb download which formats the last block when flash toolcfg is enabled
2. [UI] Fix the "UNKNOWN" bins error message when users re-start Flash Tool
3. [UI] Enable the DUAL_MAC_DSP_BL when user chooses any of the boot loaders.
4. [DA] Fix the boot loader USB download error in WIN BOUND flash
Enhancements:
N/A
Memory support:
N/A
v5.1116.00
1. Support MXIC serial flash OTP mechanism
2. Support MT6276 FOTA feature
3. Support MT6251 Root Certificate mechanism
Bug fixes:
1. [DA] Support MT6251 partial download for MBA project
2. [DA] Fix NOR AMD OTP bug which caused program fail
3. [DA] Fix recovery range error which caused partial download fail
4. [DA] Fix MT6236 Memory Test
Enhancements:
1. [Flash Tool] Support to allocate MAUI bins in 4KB boundary address
2. [Flash Tool] MT6276/MT6251 support format FAT via S-USBDL
Memory support:
1. [Flash Tool] Support MT6251/MT6252 PCT serial flash
[Guide] How To Download Correct Firmware or Rom For HTC.
i seen many of people have problem to flash htc,because of they don't know which file is correct for their phone.
Let me explain you,what you have to do first when you get htc in your shop.
1.adb fastboot must be installed.
Q.don't know what is adb and fastboot ?it's ok look below
A.Fastboot & ADB Tool with Driver [Solution]
2.for get correct firmware for htc mobile,you must have to know cid and main-ver.
Q.how to know cid and main-ver,i'm totally new to htc ?
?
A.after setup adb and fastboot,you have to write simple commands..
command for cid:fastboot getvar cid
command for main-ver:fastboot getvar all
we need this info letter,keep it note.
3.now you have cid and main-ver,so you can download file now.
but please before download file check this thread and match your cid to know carrier and country.
[Archive] HTC CID List
4.you must have to know htc file description.
exm:RUU_Bravo_Froyo_O2_UK_2.14.207.1_Radio_32.44.0 0.32U_5.09.05.30_2_release_144166_signed.exe
RUU = rom update utility.
Bravo = phone model.
Froyo = phone android version.
O2_UK= Carrier of firmware.
2.14.207.1 = main version of rom.
5.now you already know your carrier by cid,and main-ver.
just download rom which carrier is same,and main-ver equal or higher.
6.ok now we know everything but where to download
i know three biggest sites,first one is father of all
1.Google
2.Shipped ROMs
3.Directory listing of http://androidfiles.org/ruu/
command problems:
unknown error while flashing.
just have to relock bootloader.
if your cid is =1111111 that's mean you have super cid you can write any rom on your phone,but main-ver should be higher.
this thread was for s-on users,s-off user can write any rom on their phone.
if you want to update your phone by sdcard.
[Guide] How to Upgrade Your HTC Android Phone with a microSD card
if it's useful make it sticky,thank you for reading my thread.
Let me explain you,what you have to do first when you get htc in your shop.
1.adb fastboot must be installed.
Q.don't know what is adb and fastboot ?it's ok look below
A.Fastboot & ADB Tool with Driver [Solution]
2.for get correct firmware for htc mobile,you must have to know cid and main-ver.
Q.how to know cid and main-ver,i'm totally new to htc
?A.after setup adb and fastboot,you have to write simple commands..
command for cid:fastboot getvar cid
command for main-ver:fastboot getvar all
we need this info letter,keep it note.
3.now you have cid and main-ver,so you can download file now.
but please before download file check this thread and match your cid to know carrier and country.
[Archive] HTC CID List
4.you must have to know htc file description.
exm:RUU_Bravo_Froyo_O2_UK_2.14.207.1_Radio_32.44.0 0.32U_5.09.05.30_2_release_144166_signed.exe
RUU = rom update utility.
Bravo = phone model.
Froyo = phone android version.
O2_UK= Carrier of firmware.
2.14.207.1 = main version of rom.
5.now you already know your carrier by cid,and main-ver.
just download rom which carrier is same,and main-ver equal or higher.
6.ok now we know everything but where to download
i know three biggest sites,first one is father of all
1.Google
2.Shipped ROMs
3.Directory listing of http://androidfiles.org/ruu/
command problems:
unknown error while flashing.
just have to relock bootloader.
if your cid is =1111111 that's mean you have super cid you can write any rom on your phone,but main-ver should be higher.
this thread was for s-on users,s-off user can write any rom on their phone.
if you want to update your phone by sdcard.
[Guide] How to Upgrade Your HTC Android Phone with a microSD card
if it's useful make it sticky,thank you for reading my thread.
[Guide] How to Upgrade Your HTC Android Phone with a microSD card
1. Extract rom.zip from an RUU
A. Run the RUU. For example, you want to update your Desire HD with RUU_Ace_Sense30_S_HTC_WWE_3.12.405.1_Radio_12.65.6 0.29_26.14.04.28_M_release_225512_signed.exe. Run this file and wait till extract (you'll see a bar going from left to right) and after that leave it as it is (don't click next or don't close the program)2. Rename the rom.zip file
B. Go to your PC temp folder. For win7 its C:\Users\<user name>\AppData\Local\Temp and for winXP its C:\Documents and Settings\<user name>\Local Settings\Temp and look for the last created folder. Open that.
C. You'll get a rom.zip file there. Copy it to desktop or other suitable place. Now you can close the RUU program.
A. You can't directly update the rom.zip file. You've to rename it according to your phone model number. Look for the model number in the serial sticker under battery. For Desire HD its PD98100, for Wildfire S its PG76100 etc. Take first four letter from this model number and then add IMG. So, for example for Desire HD rom.zip should be renamed as PD98IMG.zip and for Wildfire S it should be remaned as PG76IMG.zip3. Update the ROM
B. Now put this renamed file to a microSD card.
A. Insert the card to microSD slot of the phone.
B. Power on the phone in HBOOT mode with microSD inserted. For most HTC android phones you have to press VolDown then Power to go to HBOOT mode. Wait for a while, phone will read the zip file and will ask you for update confirmaton. Read the screen instruction and press required button.
C. Update will start. Be patient and wait till being finished.
!!! CONGRATULATIONS !!! YOU'VE UPGRADED YOUR PHONE !!!
Common Errors:
* CID Incorrect : means you are trying wrong region ROM. Use correct region ROM or use Gold Card or make your phone superCID first.
* MODEL Incorrect : you're using other phone's ROM. you can't do it.
* Main Version Low : means phone's HBOOT version is higher than the ROM in your SD card. Use same or higher HBOOT rom's or S-OFF you phone.
[Archive] HTC CID List
SuperCID 11111111
Asia-HK-CHT HTC__622
ATT CWS__001
BM BM___001
Bouygues-Telecom BOUYG201
Brightstar-PTB BSTAR502
Brightstar-SPA BSTAR301
Chunghwa-Taiwan CHT__601
CA_Dave DAVE_001
CA_Videotron VIDEO001
CT HTCCN702
CU HTCCN703
DCM DOCOM801
DOPOD DOPOD701
Era T-MOB009
Entel BSTAR306
Tigo BSTAR307
Movistar BSTAR308
Fastweb-IT FASTW401
GOOGLE GOOGL001
H3G-AT H3G__106
H3G-DAN H3G__F05
H3G-Italy H3G__402
H3G-ROI H3G__003
H3G-SWE H3G__G04
H3G-UK H3G__001
HTC-Asia-SEA HTC__037
HTC-Asia-SEA-WWE HTC__044
HTC-Australia HTC__023
HTC-BE HTC__E41
HTC-Czech HTC__C24
HTC-Denmark HTC__F08
HTC-Dutch HTC__E11
HTC-EastEurope HTC__032
HTC-ELL HTC__N34
HTC-FRA HTC__203
HTC-FRA-Bouygues HTC__247
HTC-FRA-NRJ HTC__249
HTC-GCC HTC__J15
HTC-GER HTC__102
HTC-India HTC__038
HTC Israel HTC__K18
HTC-ITA HTC__405
HTC-Nor HTC__Y13
HTC-Norway HTC__H10
HTC-Poland HTC__B25
HTC-PTG HTC__506
HTC-Russia HTC__A07
HTC-SPA HTC__304
HTC-Sweden HTC__G09
HTC-Tesco HTC__052
HTC-Turkey HTC__M27
HTC-WWE HTC__001
Hutch-Australia HUTCH001
O2-DE O2___102
O2-UK O2___001
Open-Channel HTCCN701
Optus-Australia OPTUS001
ORANGE-AT ORANG113
ORANGE-BE ORANG012
ORANGE-CH-FRA ORANG203
ORANGE-CH-GER ORANG104
ORANGE-ES ORANG309
ORANGE-French ORANG202
ORANGE-PL ORANGB10
ORANGE-PO ORANG008
ORANGE-SK ORANG006
ORANGE-UK ORANG001
Rogers ROGER001
SKT_KR SKT__901
SMC-Voda-HK SMCVD001
TELEF-Spain TELEF301
Telstra TELST001
TELUS TELUS001
TIM-Italy TIM__401
TMA T-MOB102
TMCZ T-MOB004
TMD T-MOB101
TMH T-MOB007
TMHR T-MOB006
TMMK T-MOBL11
TMNL T-MOB003
TMSK T-MOB008
TMUK T-MOB005
TMUS T-MOB010
TWM-TW HTC__621
VIRGIN-UK VIRGI001
VODA-Africa-South HTC__016
VODA-Australia VODAP021
VODA-Germany VODAP102
VODA-Greece VODAP006
VODA-Ireland VODAP019
VODA-Italy VODAP405
VODA-Mobilkom VODAP120
VODA-Netherland VODAPE17
VODA-New-Zealand VODAP022
VODA-Portugal VODAPD18
VODA-Proximus VODAP024
VODA-SA VODAP026
VODA-SFR VODAP203
VODA-Spain VODAP304
VODA-Swisscom-DE VODAP110
VODA-Swisscom-FR VODAP212
VODA-Swisscom-IT VODAP416
VODA-Swisscom-WWE VODAP015
VODA-TR VODAPM27
VODA-UK VODAP001
Fastboot & ADB Tool with Driver [Solution]
Fastboot : Fastboot is a special
diagnostic and engineering protocol. You can boot your HTC Android
Devices into fastboot mode. While in fastboot, you can modify the file
system images from a computer like you can flash kernel as well as other
partitinos.
ADB : ADB stands for Android Debug Bridge. Its a tool to send commnads to Android Phones from Computer Command Line.
Download Fastboot & ADB tool and driver
Dev-Host - Fastboot+ADB(20926).zip
If you are more advanced and want more on android developing you can download Android SDK
Android SDK | Android Developers


Beyond-Mi-Book-Mi5-Tablet hang on logo done by Volcano Box
Beyond-Mi-Book-Mi5-Tablet hang on logo done by Volcano Box
Wipe on ADB
Root Done

Wipe on ADB

China High Copy Samsung Galaxy S4 I9500 Root Wipe All By Magic Box
After Original Samsung Galaxy S4 I9500 Successfully Rooted With Volcano Box
China High Copy Samsung Galaxy S4 I9500
Successfully
Root
Wipe All
With
Volcano King Of All
Only One Click & Your Job Done

China High Copy Samsung Galaxy S4 I9500
Successfully
Root
Wipe All
With
Volcano King Of All
Only One Click & Your Job Done


SAMSUNG REX 70 (GT-S3802) Hare Is Flash File Or Tool
SAMSUNG REX 70 (GT-S3802) Hare Is Flash File Or Tool

Flash FILE
FlasherFlash FILE
Quote:
FlashTool_E2_v4.102 - Download - 4shared - Chaurasiya BrothersHare Is Flashing Process
Quote:
GT-S3802 Process - Download - 4shared - Chaurasiya Brothers Easy-JTAG Update 1.0.75.0 - SAMSUNG, SKY, HTC via EMMC
Easy-JTAG Update 1.0.75.0 - SAMSUNG, SKY, HTC via EMMC
Added via JTAG connection:
- support HTC ONE M7 PN07130 (Read/Write,OneClickRepair)
- support SKY A840S (Read/Write,OneClickRepair)
- support Samsung GT-S7560 (Read/Write,OneClickRepair)
- support Samsung SGH-T589 (Read/Write)
- support Samsung SGH-T599 (Read/Write)
Added via EMMC TOOL:
- support HTC Butterfly [X920E] PL99200 (READ/Write Main Area) - first in the world
Easy-JTAG Update 1.0.75.0 - SAMSUNG, SKY, HTC Butterfly [X920E] via EMMC Direct
Easy-JTAG Update Update 1.0.75.0 - SAMSUNG, SKY, HTC via EMMC
Added via JTAG connection:
- support HTC ONE M7 PN07130 (Read/Write,OneClickRepair)
- support SKY A840S (Read/Write,OneClickRepair)
- support Samsung GT-S7560 (Read/Write,OneClickRepair)
- support Samsung SGH-T589 (Read/Write)
- support Samsung SGH-T599 (Read/Write)
Added via EMMC TOOL:
- support HTC Butterfly [X920E] PL99200 (READ/Write Main Area) - first in the world
Discuss here
Maintenance_v1.0.0.956_WinTest Xp/Win7/Win8 32/64 Bit Test Version !
Hi,
This is an test build meant to verify if the application runs properly on 64 bit version of Windows since some users experienced some problems before. Please test it hardly and let us know if works properly now.
Also
[x] We removed external dll dependency so please delete SYSTEM.dll
[x] We set up support to open in MS Internet Explorer from now on and made it smarter.
So again test all the functions available and let us know if any problems show up.
CLICK ME TO DOWNLOAD

mvs android tool v3.0
mvs android tool v3.0
here screeshot

cheak device in normalmode
cheak device in fastboot mode
enter to download mode
enter to fastboot mode
enter to recovery mode
flash updte.zip in fastboot mode(some models not support)
flash data.img in fastboot mode
flash recovery.img in fastboot mode
flash cache.img in fastboot mode
flash boot.img in fastboot mode
htc detailes
htc cid detailes
htc read cid
htc write cid
htc write super cid
htc goldcard creating
all htc opration in fastboote mode
next version
mvs android tool v4.0
adding in samsung unlock without data lose
heartly thanks to
sureshraaja007
vinugsm
here download link
here screeshot
cheak device in normalmode
cheak device in fastboot mode
enter to download mode
enter to fastboot mode
enter to recovery mode
flash updte.zip in fastboot mode(some models not support)
flash data.img in fastboot mode
flash recovery.img in fastboot mode
flash cache.img in fastboot mode
flash boot.img in fastboot mode
htc detailes
htc cid detailes
htc read cid
htc write cid
htc write super cid
htc goldcard creating
all htc opration in fastboote mode
next version
mvs android tool v4.0
adding in samsung unlock without data lose
heartly thanks to
sureshraaja007
vinugsm
here download link
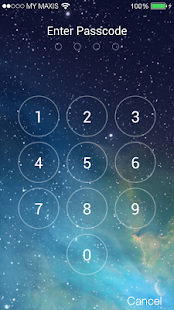
iOS7 Lockscreen for all Android Mobile Phone
Now you can enjoy iOS 7′s new parallax on your android lockscreen instead of waiting for the next iPhone!


Description
The first iOS 7 lockscreen with Parallax 3d effect! Prank your friend with your own iPhone. Support custom wallpaper too
*Latest Features* - Custom Wallpaper is now available!
*Latest Features* - More controls available on the control center!
*Dark Holo Theme* - Now the app are in dark holo theme! Looks much clean and nicer!
The FIRST iOS 7 Lockscreen with Parallax effect!
Now you can enjoy iOS 7's new parallax on your android lockscreen instead of waiting for the next iPhone!
*Update - New Wallpaper* 2 new wallpapers available!
*Fixes - Improved Performance
*Note* On some devices the home button might response slow. But it will lock back your phone after a few seconds.
★ Set pin to enhance your phone security
★ Launch app from lockscreen
★ iOS 7 wallpaper available for selection!
★ Simulate the best iOS 7 Lockscreen.
★ Best View on HD Android Phone.
★ Built specially for lockscreen. Consume less memory and battery.
Playstore link
Or
DOWNLOAD APK
Samsung I727 Flash 100% tested
Hello support
I resurrected My I727 dead boot with last medusa Update OK ... But when i try to Flash with ODIN stop in Setup conection .. any idea ?? ,,, other problem that i see is that the PC recognize the port OK... but In display Phone Can´t see the download MODE ....
I try with odin 1.85, 1.87, etc and same problem. All drivers i think is OK.. but i was see that First the PC detect a new ZEUS Driver when i put in download mode this phone.. I go to Control panel and change for Qualcomm HS-USB QLOADER 9008 mode , etc etc,, and odin can detect that Port driver .... but Always when i try to flash the firmware stop in setup conection
Any idea ?? I think is not resurrected OK ... I cant see the Emergency download Mode in phone display ...
.. here logs medusa resurrect details ...
Log started at 24/11/2012 19:25:24 ...
Welcome to Medusa Box Software version 1.6.2
Selected device model: Samsung SGH-I727
Connecting. Please wait...
VREF = 0.0V is less than required level. Please check target device power supply.
ERROR[034]: RTCK signal does not respond. Defaulting to 1 MHz.
Medusa JTAG Firmware version 1.1.0.
Medusa JTAG Hardware S64 revision C.
Detected TAP ID: 106A10E1, IR Length = 11.
MI: Halting target, attempt 1.
JTAG speed : 1000 KHz.
VREF level : 1.82 V
CPU : Qualcomm APQ8060
Core ID : 106A10E1
MI: Loading Medusa Device Server V1.2.
MI: Starting...
MI: Received status 0x0000F00F, cycle 0.
MI: Received server capabilities 0x00000191.
MI: Detailed server caps: FLASH, WDOG, A64, IOCTL
MI: Watchdog configuration: 0xB800010C, 0x00000001... ok
MI: Server init.
MI: Received flash ID 0xE0150001.
MI: Flash geometry set.
MI: Recheking settings... ok
Server caps : 00000191
Storage Device: Samsung eMMC KYL00M
Device ID : 00150001
Block size : 512 bytes
Blocks : 30777344
Storage size : 14.7 Gb
Connect successful.
Opening "C:\Users\Humbe\Desktop\SAMSUNG_SGHI727_Repair .mf" file...
Writting BOOT section. Please wait... Done
Disconnected
Samsung i727 repair boot ok
Selected device model: Samsung SGH-I727
Connecting. Please wait...
Medusa JTAG Firmware version 1.1.0.
Medusa JTAG Hardware S64 revision B.
Detected TAP ID: 4F1F0F0F, IR Length = 4.
Detected TAP ID: 106A10E1, IR Length = 11.
JTAG speed : Auto (RTCK).
VREF level : 1.82 V
CPU : Qualcomm APQ8060
Core ID : 106A10E1
Storage Device: Samsung eMMC KYL00M
Device ID : 00150001
Block size : 512 bytes
Blocks : 30777344
Storage size : 14.7 Gb
Opening "C:\Archivos de programa\GsmServer\Medusa\Firmware\SAMSUNG_SGHI727 _Repair.mf" file...
Writting PARTITION section. Please wait... Done
Writting BOOT section. Please wait... Done
Disconnected
Repair done.
Samsung C6712 IMEI Repair Done by Z3x Box
power on phone Connect usb cable ofter all drivers installed
fill imei 1 and 2 in z3x
no need serial no
select z3x comport
click on custom
when phone restarts remove cable and reconnect
two times phone restarts two times remove and reconnect cable
see here...

fill imei 1 and 2 in z3x
no need serial no
select z3x comport
click on custom
when phone restarts remove cable and reconnect
two times phone restarts two times remove and reconnect cable
see here...
Samsung I8700 Omnia 7: Flash Guide - USB Drivers - Download
Samsung I8700 Omnia 7: Flash Guide - USB Drivers - Download
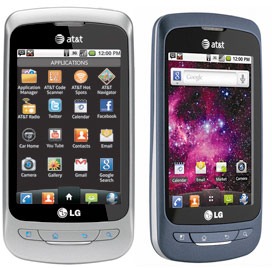
LG Thrive Hard Reset, Wipe Data to Factory Default Settings
Here's a step by step instructions on how to hard reset the LG Thrive (for AT&T mobile USA).
2G Network GSM 850 / 900 / 1800 / 1900
3G Network HSDPA
OS Android OS, v2.2 (Froyo)
CPU 600 MHz ARM 11 processor, Adreno 200 GPU, Qualcomm MSM7227 chipset
2G Network GSM 850 / 900 / 1800 / 1900
3G Network HSDPA
OS Android OS, v2.2 (Froyo)
CPU 600 MHz ARM 11 processor, Adreno 200 GPU, Qualcomm MSM7227 chipset
Precautions: Performing hard reset process will delete or wipe all data from the. We highly recommend to have a back up copy of all your important files stored on the device.
LG Thrive Factory Data Reset procedures:
1. On the main home screen, tap menu
2. Select Settings, then Privacy
3. Select Factory data reset
4. Select Reset phone
5. Enter the password if prompted, then select Erase everything.
If the LG Thrive is frozen: Reboot or restart the phone and do a hard reset through button combination.
1. Turn the power off. , take the battery out and reinsert it back again
2. Hold the Volume Down and Power Button
3. A menu will then show up such as Fastbook, Recovery, Clear Storage, and Simlock
4. Select Clear Storage by pressing the Volume Down button
5. Press and release the Power button
6. Select: Volume Up for YES and Volume Down for NO
Wait 'till the phone reboot, once the wipe process completes, the LG Thrive will return to its original factory fresh state default settings.
All data including third-party applications will be deleted from the LG Thrive . You may need to re-install it back again.
Samsung DROID Charge Hard Reset, Wipe and Restore to Factory Settings
Here's a step by step instructions on how to
hard reset the Samsung DROID Charge.Also known as Samsung SCH-i520,
Samsung Inspiration, Samsung 4G LTE, Samsung Stealth V
OS Android OS, v2.2 (Froyo)
CPU 1 GHz ARM Cortex-A8 processor, Hummingbird chipset
OS Android OS, v2.2 (Froyo)
CPU 1 GHz ARM Cortex-A8 processor, Hummingbird chipset
Precautions: This process will delete or wipe all data from the Samsung DROID Charge. We advise to have a back up copy of all your important files stored on the device.
Factory Data Reset procedures:
1. On the main home screen, tap menu
2. Select Settings, then Privacy
3. Select Factory data reset
4. Select Reset phone
5. Enter the password if prompted, then select Erase everything.
If your Samsung DROID Charge is frozen: Reboot or restart the phone.
1. Turn the power off. , take the battery out and reinsert it back again
2. Hold the Volume Down and Power Button
3. A menu will then show up such as Fastbook, Recovery, Clear Storage, and Simlock
4. Select Clear Storage by pressing the Volume Down button
5. Press and release the Power button
6. Select: Volume Up for YES and Volume Down for NO
Wait 'till the phone reboot, once the wipe process completes, the Samsung DROID Charge will return to its original factory fresh state default settings.
All data including third-party applications will be deleted from the Samsung DROID Charge.So you may need to re-install it back again.
Fix Hang/Frozen Problem for Sony Ericsson Xperia X10 mini Pro, Hard Reset
This a simple guide on how to hard reset Sony
Ericsson Xperia and restore the device to its original factory default
settings. This may also help to fix the said android smartphone if
suffered severe hang or freezing problems. This may work on Sony
Ericsson Xperia Mini, Mini Pro, X10 Mini and X10 Mini PRO.

Note: A hard reset process will wipe or delete the data stored on the device, so make sure to back of all important files you've installed or stored on the phones memory. However, this may not harm the files stored on the microSD memory card.
Factory Reset by Settings:
This can be done from Main Home Screen
then select SETTINGS, then PRIVACY
select FACTORY DATA RESET and then RESET PHONE
then choose ERASE EVERYTHING
This will wipe the present settings and then restore back the device to its factory settings.
If your Xperia X10 Mini or mini Pro experienced Hang or Freezing problem.
Sometimes you may just stuck on the start up logo, this may help if you can't access or get through to the home screen. If this happens you may reboot the phone by way of pressing button combination and do a hard reset.
- Turn the power off or remove the battery out and reinsert it back again.
- Hold the Left and right buttons found beneath the LCD display
- Briefly Press and release the Power button
- Follow the steps on-screen to hard reset your phone
If somehow if the hard reset will not fix hang or frozen problem, the only and final option is to restore or flash the phone's original stock ROM or firmware.
HTC EVO 3D Hard Reset Procedure
This are the procedures to soft/hard reset the HTC EVO 3D to its original factory default settings.

Note:
Performing a factory reset is only advisable if you want to return
back the phone to its original factory default settings and also fix
some abnormal functions of the device. We recommend to have a back up
copy all of your personal data before proceeding because the result
of this process will delete all data you previously installed on
the device. HTC EVO 3D Factory data reset:
1. On the main home screen, select menu
2. Select Settings, then Privacy
3. Select Factory data reset
4. Select Reset phone
5. Enter the password if prompted, then confirm by selecting Erase everything
HTC EVO 3D Hard reset, this may help if the phone experience some hang or frozen on some applications:
1. Turn the phone's power off. Take the battery out from the device, wait a couple of seconds and reinsert it back again.
2. Gently, Press and Hold the Volume Down button
3. Then also press and hold the Power button until the device turns on
4. A menu will then appear like: Fastbook, Recovery, Clear Storage, and Simlock
5. Just select Clear Storage by pressing the Volume Down button
6. Then press and release the Power button
7. Select Volume Up if YES and Volume Down for NO
The phone will then reboot to its factory fresh state settings, once the reset process is completes.
Any data including third-party applications previously stored from the HTC EVO 3D already wiped or deleted.
HTC Wildfire S Soft/Hard Reset, Format to Factory Settings
Note: Performing a hard reset will permanently
delete all your data and customized settings, any applications you've
downloaded and installed on your HTC Wildfire S will also remove .
factory reset will not delete the data and files that are stored in your phone’s microSD card.Be sure to back up any data and files you want to keep before you do a factory reset.
Restarting your HTC Wildfire S phone (soft reset)
If the phone is runs slower than normal, an application is not performing properly, or your phone becomes unresponsive, just try restarting your phone and see if that helps solve the problem.
To restart your phone, simply turn it off and back on. If pressing and holding the POWER button doesn't work, then remove the battery, wait for a few seconds, reinsert the battery, and then turn the phone on.
HTC Wildfire S - Factory reset via settings
1. From the Home screen, press MENU
2. Select Settings.
3. Scroll down the screen and
4. Then tap Privacy, select Factory data reset.
5. On the Factory data reset screen, tap Reset phone.
6. Then select Erase everything.
HTC Wildfire S- Performing a factory reset using phone button combination.
If you cannot turn on your phone or access the phone settings, you can still perform a factory reset by using the buttons on the phone.
1. With the HTC Wildfire S phone turned off, press and hold the VOLUME DOWN button, and then briefly press the POWER button.
Note: If you are not sure whether your phone's power is turned off, remove and then reinsert the battery.
2. Wait for the screen with the three Android images to appear, and then release the VOLUME DOWN button.
3. Press VOLUME DOWN to select CLEAR STORAGE, and then press POWER.
4. Press VOLUME UP to start the factory reset.
HTC Desire S Hard Reset, Format to Factory Default Settings
HTC Desire S Hard Reset, Format to Factory Default Settings
Restarting your HTC Desire S phone (soft reset)
If the phone is runs slower than normal, an application is not performing properly, or your phone becomes unresponsive, just try restarting your phone and see if that helps solve the problem.
To restart your phone, simply turn it off and back on. If pressing and holding the POWER button doesn't work, then remove the battery, wait for a few seconds, reinsert the battery, and then turn the phone on.
HTC Desire S - Factory reset via settings
1. From the Home screen, press MENU
2. Select Settings.
3. Scroll down the screen and
4. Then tap Privacy, select Factory data reset.
5. On the Factory data reset screen, tap Reset phone.
6. Then select Erase everything.
HTC Desire S- Performing a factory reset using phone button combination.
If you cannot turn on your phone or access the phone settings, you can still perform a factory reset by using the buttons on the phone.
1. With the HTC Desire S phone turned off, press and hold the VOLUME DOWN button, and then briefly press the POWER button.
Note: If you are not sure whether your phone's power is turned off, remove and then reinsert the battery.
2. Wait for the screen with the three Android images to appear, and then release the VOLUME DOWN button.
3. Press VOLUME DOWN to select CLEAR STORAGE, and then press POWER.
4. Press VOLUME UP to start the factory reset.
Note: Performing a hard reset will permanently
delete all your data and customized settings, any applications you've
downloaded and installed on your HTC Desire S will also wipe .
factory reset will not delete the data and files that are stored in your phone’s microSD card. Just ensure to back up any data and files you want to keep before you may proceed to a factory reset.
This is a step by step instruction on how to Factory Reset and Hard Reset the HTC Desire S from HTC support.
Restarting your HTC Desire S phone (soft reset)
If the phone is runs slower than normal, an application is not performing properly, or your phone becomes unresponsive, just try restarting your phone and see if that helps solve the problem.
To restart your phone, simply turn it off and back on. If pressing and holding the POWER button doesn't work, then remove the battery, wait for a few seconds, reinsert the battery, and then turn the phone on.
HTC Desire S - Factory reset via settings
1. From the Home screen, press MENU
2. Select Settings.
3. Scroll down the screen and
4. Then tap Privacy, select Factory data reset.
5. On the Factory data reset screen, tap Reset phone.
6. Then select Erase everything.
HTC Desire S- Performing a factory reset using phone button combination.
If you cannot turn on your phone or access the phone settings, you can still perform a factory reset by using the buttons on the phone.
1. With the HTC Desire S phone turned off, press and hold the VOLUME DOWN button, and then briefly press the POWER button.
Note: If you are not sure whether your phone's power is turned off, remove and then reinsert the battery.
2. Wait for the screen with the three Android images to appear, and then release the VOLUME DOWN button.
3. Press VOLUME DOWN to select CLEAR STORAGE, and then press POWER.
4. Press VOLUME UP to start the factory reset.
HTC Arrive Hard Reset, Format Factory Settings
The HTC ARRIVE is the first Sprint smartphone powered by Microsoft's Windows Phone 7.
Performing a hard reset may help if you want or decide to sell your HTC Arrive and buy a new device?This process will restore the phone to its original factory state default settings
your Arrive will be restored to a like-new state with all of your files and personal information cleared from memory.

This is a simple instruction on how to hard reset your HTC Arrive:
1. From the home screen, swipe left to expose your app list
2. Tap Settings
3. Scroll down and tap about
4. Tap reset your phone
5. Tap yes to confirm, then tap yes to confirm again
Once the reset process completes, It will then reboot and you'll be left with a factory fresh phone.
Google Nexus S 4G Hard Reset Procedure
Here's how to hard reset the Google Nexus S 4G
also known as Samsung SPH-D720. This will restore the phone data to
original factory default settings. This help fix if the phone
experience several error problem like frozen or unresponsive.
Please note: Make a back up copy of all your personal data first, before proceeding. The result of this procedure will delete all data from the Google Nexus S 4G.

Please note: Make a back up copy of all your personal data first, before proceeding. The result of this procedure will delete all data from the Google Nexus S 4G.
Factory reset:
1. On the main home screen, select menu
2. Tap Settings, then Privacy
3. Select Factory data reset
4. Select Reset phone
5. Enter the password if prompted, then confirm by tapping Erase everything
Hard Reset:
1. Turn the power off. Take the battery out from the phone and reinsert it back again
2. Hold the Volume Down button
3. Press and release the Power button
4. You are now presented with a menu that allows for Fastbook, Recovery, Clear Storage, and Simlock
5. Select Clear Storage by pressing the Volume Down button
6. Press and release the Power button
7. Confirm by selecting: Volume Up for YES and Volume Down for NO
Once the wipe is complete, the phone will reboot to its factory fresh state.
T-Mobile LG G2X Hard Reset
Here's the procedure on how to hard reset the LG G2x to clear all data and restore its original settings.
Be aware that the result of this process will delete all the data stored on the device.. We recommend to make a back up copy of all your personal data before proceeding. Performing a hard reset is only advisable if the phone experience several error problems like frozen or unresponsive.

Be aware that the result of this process will delete all the data stored on the device.. We recommend to make a back up copy of all your personal data before proceeding. Performing a hard reset is only advisable if the phone experience several error problems like frozen or unresponsive.

Here's how to factory reset the phone safely, you may try this first.
1. From the home screen, select Menu
2. Select Settings,
3. Select Privacy
4. Select Factory data reset
5. Select Reset phone
6. Enter the password if prompted,
7. Then confirm by selecting Erase everything
Hard reset the LG G2x - this may help if the phone is frozen but this will delete all data you previously installed on the device.
1. Turn OFF the phone's power then take the battery out from the device and reinsert it back again.
2. Hold the Volume Down button
3. Briefly press and hold the Power button until the phone turns on
4. A menu appears: Fastbook, Recovery, Clear Storage, and Simlock
5. Just select Clear Storage by pressing the Volume Down button
6. Press and release the Power button
7. Select Volume Up for YES and Volume Down for NO
Wait 'till the phone completely reboot..
All data including 3rd-party applications you installed on your LG G2X already wipe out. You need to re-install it back again. Enjoy!
T-Mobile LG G2X Hard Reset
Here's the procedure on how to hard reset the LG G2x to clear all data and restore its original settings.
Be aware that the result of this process will delete all the data stored on the device.. We recommend to make a back up copy of all your personal data before proceeding. Performing a hard reset is only advisable if the phone experience several error problems like frozen or unresponsive.
Be aware that the result of this process will delete all the data stored on the device.. We recommend to make a back up copy of all your personal data before proceeding. Performing a hard reset is only advisable if the phone experience several error problems like frozen or unresponsive.
Here's how to factory reset the phone safely, you may try this first.
1. From the home screen, select Menu
2. Select Settings,
3. Select Privacy
4. Select Factory data reset
5. Select Reset phone
6. Enter the password if prompted,
7. Then confirm by selecting Erase everything
Hard reset the LG G2x - this may help if the phone is frozen but this will delete all data you previously installed on the device.
1. Turn OFF the phone's power then take the battery out from the device and reinsert it back again.
2. Hold the Volume Down button
3. Briefly press and hold the Power button until the phone turns on
4. A menu appears: Fastbook, Recovery, Clear Storage, and Simlock
5. Just select Clear Storage by pressing the Volume Down button
6. Press and release the Power button
7. Select Volume Up for YES and Volume Down for NO
Wait 'till the phone completely reboot..
All data including 3rd-party applications you installed on your LG G2X already wipe out. You need to re-install it back again. Enjoy!
Kyocera ECHO M9300 Hard Reset to Factory Settings Procedures
These is the step by step procedures on how to
hard reset the Kyocera M9300 ECHO with Android OS, v2.2 (Froyo), 1GHz
Scorpion processor, Qualcomm QSD 8650 Snapdragon.

Please
note: Performing a factory reset is only advisable if you want to
return back the phone to its original factory default settings and
also fix some abnormal functions of the device.Just make a back up copy of all your personal data before proceeding because the result of this process will delete all data you previously installed on the device.
This is a simple guide if you want to return the device to its original factory settings again.
Factory data reset of Kyocera M9300 ECHO:
1. On the main home screen, select menu
2. Select Settings, then Privacy
3. Select Factory data reset
4. Select Reset phone
5. Enter the password if prompted, then confirm by selecting Erase everything
Kyocera M9300 ECHO Hard reset, this may help if the phone experience some hang or frozen on some applications:
1. Turn the phone's power off. Take the battery out from the device, wait a couple of seconds and reinsert it back again.
2. Now, Hold the Volume Down button
3. Then press and hold the Power button until the device turns on
4. A menu will show up like: Fastbook, Recovery, Clear Storage, and Simlock
5. Just select Clear Storage by pressing the Volume Down button
6. Then press and release the Power button
7. Select Volume Up if YES and Volume Down for NO
Once the reset process is complete, the phone will then reboot to its factory fresh state settings.
Any data including third-party applications previously stored from the Kyocera M9300 ECHO already wiped or deleted.
Apple iPad 2 Factory Reset Contents and Settings Instruction
Some expected pure gold: a tablet that runs as fast as a laptop and weighs less than a newspaper.
Yet, the reality with the iPad 2 is that Apple has taken an iterative approach. In many ways, the iPad 2 is a crowd pleaser because it does not rock the boat.
Yet, the reality with the iPad 2 is that Apple has taken an iterative approach. In many ways, the iPad 2 is a crowd pleaser because it does not rock the boat.

Dont' worry, here's how to factory reset the Apple iPAD 2
1. On your iPad 2 home screen, tap the Settings icon
2. Tap General in the menu to the left of the screen, then tap Reset
3. Here, you will have two options:
1. "Reset All Settings" will restore all of your app settings to their original status
2. "Erase All Content and Settings" will reset all app settings and erase all of your data (photos, apps, bookmarks, music, etc.)
4. After selecting one of the two options above, your iPad 2 will reboot
5. If you selected "Erase All Content and Settings", you will need to reconnect your iPad 2 to iTunes in order to reactivate it
Infinity best drivers for windows 8
go to start to run And then type .. (winmsd.exe)
Then System Type X86- or 64
go to download drive
Operating system
Download
WinUSB Drivers x64.7z
WinUSB Drivers x86.7z
and install Operating system
Then System Type X86- or 64
go to download drive
Operating system
Download
WinUSB Drivers x64.7z
WinUSB Drivers x86.7z
and install Operating system
Blacberry 9000 headphone mode problem solution ,ear spk problem ways jumper solution
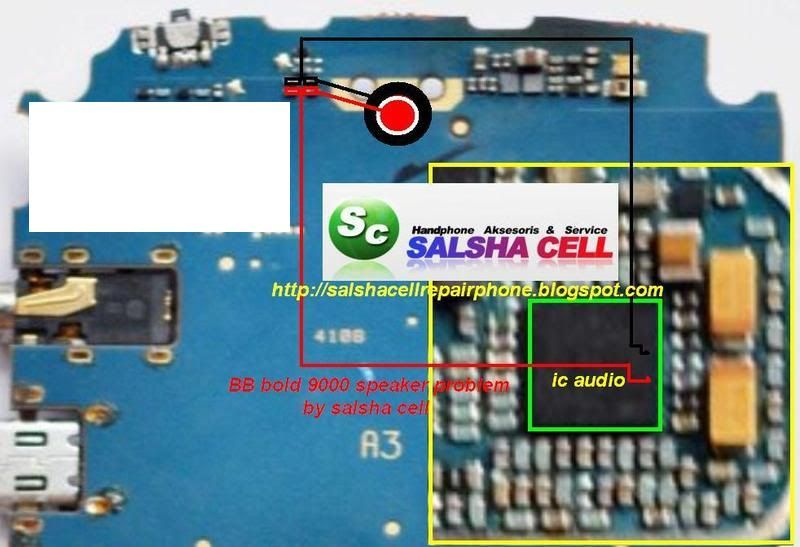
if your phone hadset mark problem follow steps.. try 1 by one.................
1. Go to the setting and select profile management there. Then select normal profile and with it in enhancement mode select the headset mode.
2. Now first open the mobile and change the handsfree jack and check problem.
3. If the problem still remains after changing the handsfree jack, then we have to use the jumper for a sound IC.
4. First connect point 1 to the sound transistor as shown in the image below:
5. Then connect point 2 of the handsfree jack to the transistor as shown in the image.

6. Then connect the 3rd point to the other resistance as shown in the image:7. Now connect the 4th point to another resistance properly.
8. And after all that is done connect the final and last point for a blank connection.
9. Now check the problem and if there is still a problem then finally change the sound IC as shown in the image with the rectangle mark.
1. Go to the setting and select profile management there. Then select normal profile and with it in enhancement mode select the headset mode.
2. Now first open the mobile and change the handsfree jack and check problem.
3. If the problem still remains after changing the handsfree jack, then we have to use the jumper for a sound IC.
4. First connect point 1 to the sound transistor as shown in the image below:
5. Then connect point 2 of the handsfree jack to the transistor as shown in the image.
6. Then connect the 3rd point to the other resistance as shown in the image:7. Now connect the 4th point to another resistance properly.
8. And after all that is done connect the final and last point for a blank connection.
9. Now check the problem and if there is still a problem then finally change the sound IC as shown in the image with the rectangle mark.
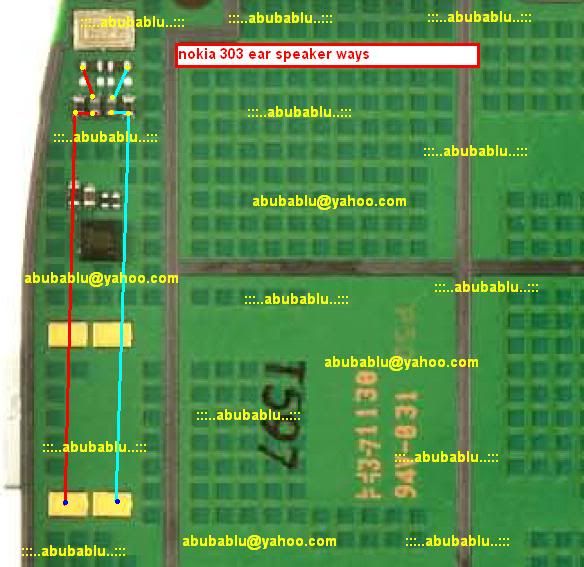
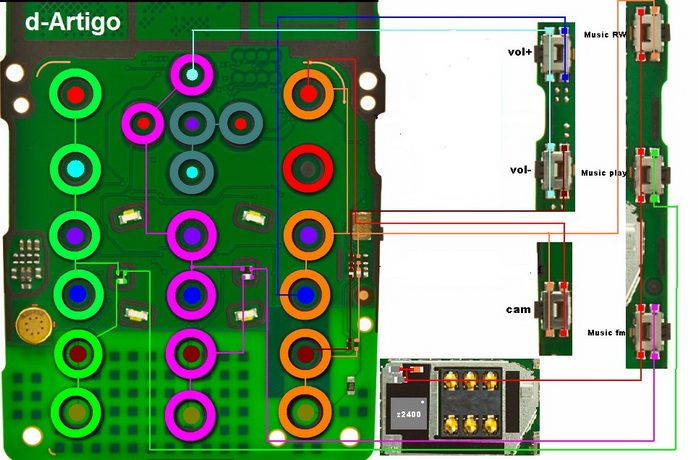
Nokia C2-03 button calling key does not work solution 100% tested solution
nokia c2-03,06 calling key not warking
i 100% try ok

i 100% try ok
Root Any Maxx Mobile Phone Easily in Few Steps
If you are
using Android Mobile and need the rooting in Android Mobile. I am share
the Tutorial which may be helpful in rooting for your Mobile....
Precaution :
1. 70 to 80% Charging
2. Backup of Data your Mobile Phone
Software and Thinks Needed :
1. USB Cable
2. Maxx Mobile and PC
3. Unlock Root Software
4. Maxx Mobile PC Suite and Adb Driver
Procedure For Root Your LG Android Mobile :
1. Download the Unlock Root Software and installed in the PC
2. Then Installed the PC Suite of Mobile in the PC
3. Then connect your Mobile to PC using the USB Cable
4. Enable the USB Dubugging Mode
5. Then open the UNLOCK ROOT SOFTWARE
6. and Click on the ROOT Option
7. Then wait few seconds your Mobile Will Be Rooted....
Disclaimer :
1. This Tutorial May Be Work
2. Use this Method On Your RISK.
HWK Offline Installer By Sarfraz Husain (Momin Telecom)
HWK Offline Installer
This is very use full For All User
Have A problem After Format Pc
Many Time install with Internet Have Big Problem
Net Is Slow /Very Slow
Don't worry
I Make Hwk Offline Installer
Only 2 or 3 File Missing In this setup
Not Have A Big Problem
Here Is Solution


HWK Offline installer By Sarfraz Husain1


HWK Offline installer By Sarfraz Husain 2
Password= shahzaib husain
Download
Install
After iInstall
Install Ufs Panel Latest Version
UFSx_Support_Suite_Setup_v02.03.00.02
1-Scan Box
2- Check Box
3-Update Box
Go to Software Tab
1-Scan Server
After See All Files
Click On Install
i Think 2-3 Files Missing This Setup
And
Last Download Dhlt
Download _DHLT.part01.exe
Download _DHLT.part02.rar
Download _DHLT.part03.rar
Download _DHLT.part04.rar
Download _DHLT.part05.rar
Download _DHLT.part06.rar
Download _DHLT.part07.rar
After Download All DHLT file Salect All And Extract
And
Past - C:\Program Files\SarasSoft\UFS\UFS_SAMs
you Have DHLT File
No need To Download
Now Enloy
Subscribe to:
Posts (Atom)
All About Mobiles Headline Animator